Food Photography
How to Convert Food Photography into AI Prompts: A Complete Guide for Menus, Blogs, and Social Content
July 21, 2026 · 16 min read

Food is deceptively hard to prompt. A plate of pasta or a stacked burger looks simple compared to a portrait or a landscape, but it's carrying an enormous amount of information in a small frame: the glisten of oil on a seared crust, the way steam curls off a bowl of ramen, the specific ivory-to-caramel gradient of a properly toasted crust. Describe a dish the way you'd describe a product on a shelf — "a plate of pasta, delicious, high quality" — and you'll get something that could be stock art for any restaurant anywhere. Describe it the way a food stylist actually looks at it, and an AI generator can produce something that reads as a specific dish, shot with intention.
That gap is what this guide closes. Converting food photography into an AI prompt means naming the same things a food photographer or stylist would call out on set — the dish, the plating, the light, the angle, the surface, and the small textural cues that make food look edible rather than plastic. Whether you're building a restaurant menu, a food blog, or a batch of social content, the process is the same, and it's learnable in an afternoon.
We'll walk through the six elements a food prompt needs, the shot types worth recognizing before you write a word, a copy-paste workflow for reverse-engineering a prompt from an existing photo using ChatGPT or Gemini, and how to format the same underlying description for Midjourney, Flux, Stable Diffusion, DALL·E, and Gemini.
Why Food Photography Prompts Are Their Own Category
Food photography sits at an odd crossroads: the subject is static like a product, but it's also organic, textured, and time-sensitive in a way a bottle or a sneaker never is. Steam only looks right rising for a few seconds. A scoop of ice cream photographs differently at minute one than at minute five. Sauce pools and settles. None of that is something an AI generator can literally simulate, but it is something you can describe — and describing it precisely is what separates an appetizing result from a waxy, over-lit one that looks more like a museum diorama than a meal.
There's also a trust problem specific to food. Viewers have eaten thousands of real meals, so they're unusually good at spotting when something is slightly off — a sauce with the wrong viscosity, garnish that's floating instead of resting, a crust that's too uniformly brown to be real. Generic prompting language ("delicious," "mouth-watering," "gourmet") does nothing to prevent this, because none of those words describe anything a model can render. What actually prevents it is naming the same visual, checkable details a stylist would: the sheen from a light glaze, the slight char at the edges of grill marks, the way a fork has disturbed one bite to show the interior.
The Six Elements That Define a Food Photography Prompt
Every strong food photography prompt is built from the same six layers. Work through them in this order and the result reads like a stylist's shot note instead of a list of adjectives.
1. The dish and its ingredients
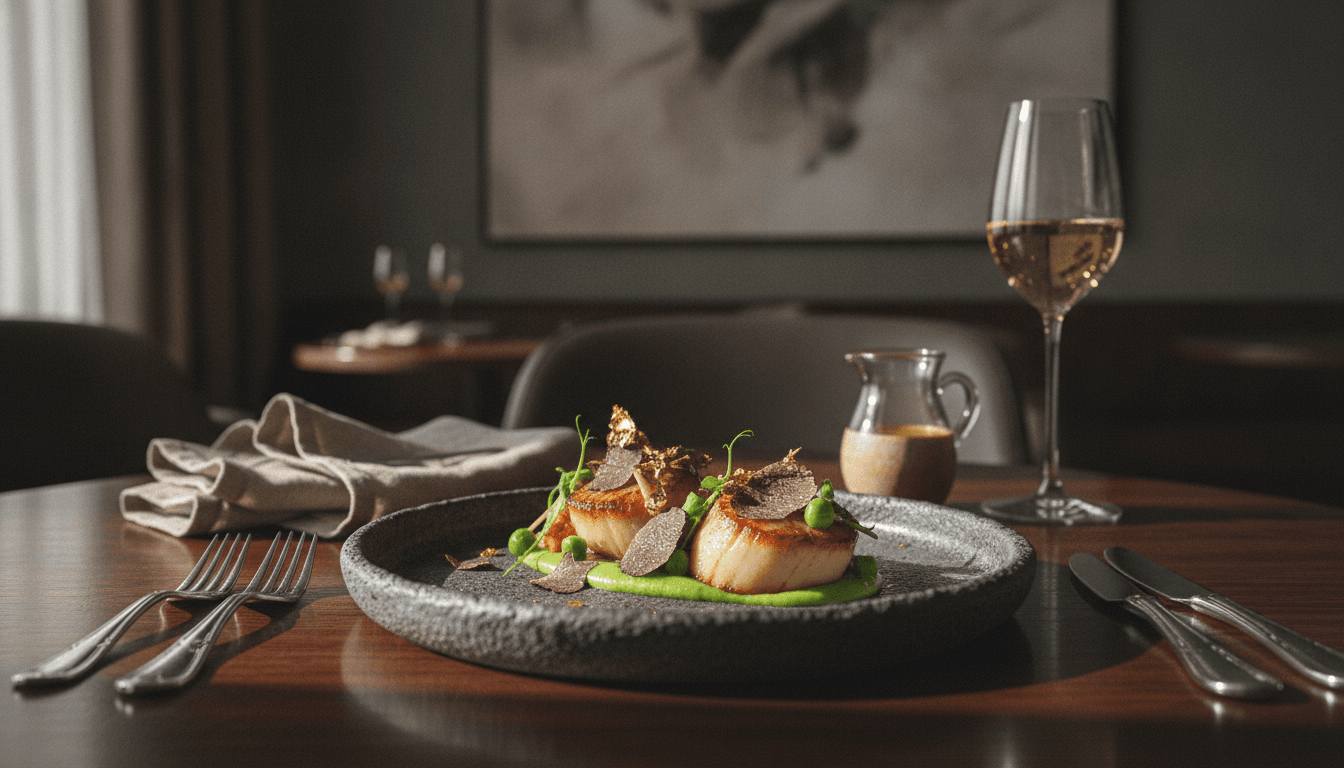
Name the dish specifically, then name what's visibly on the plate — not the recipe, just what a camera would actually capture. "Seared scallops with a golden-brown crust, resting on a pool of pea purée, three per plate" gives a generator far more to work with than "scallop dish." If there's a garnish that carries visual weight — a scatter of microgreens, a drizzle in a specific pattern, a dusting of flaky salt — name it, since garnish is often the first thing a viewer's eye lands on.
2. Plating and composition
Describe how the food is arranged on the plate or in the bowl, not just what's on it. Restaurant plating tends to be deliberate — off-center placement, a sauce swipe, height built with stacking — while home-style or comfort food is often more casually mounded. Naming the plating style ("fine-dining plating with a sauce swipe and off-center stack" versus "rustic, generously portioned, family-style") does more to set the tone of the shot than any mood word could.
3. Lighting and mood
This is the highest-leverage layer, same as it is in product photography — but food lighting has its own well-known setups. Bright, airy natural light from a window is the standard for blogs and social content; it reads as fresh and casual. A single warm, directional light source with deep shadows is the standard for moody restaurant or editorial food photography. Name the setup: "soft natural window light from camera-left, gentle shadow falling right" or "single warm tungsten side light, deep shadows, low-key mood" — both are specific enough for a generator to act on, unlike "nice lighting" or "appetizing lighting."
4. Camera angle and lens
Food photography leans on a narrower set of angles than most other genres, and naming the right one does a lot of the composition work automatically. A top-down (flat lay) angle suits dishes with strong graphic layout — grain bowls, pizzas, spreads. A 45-degree angle is the most common all-purpose food angle, showing both the top of the dish and enough of its height to read as three-dimensional. A straight-on macro or close-up angle is used for texture-forward shots — a cross-section of a burger, a fork lifting a bite. Pair the angle with a lens cue: "50mm lens, shallow depth of field" produces a very different result from "35mm lens, everything in focus."
5. Surface and props
Name the surface the plate or bowl is sitting on, and separately name any supporting props — cutlery, a napkin, a second dish blurred in the background, ingredients scattered around the plate. "Dark slate surface, linen napkin folded to the left, a scattering of whole black peppercorns" tells a generator exactly what belongs in frame. This is also where food photography most often goes wrong in AI generation: too many props stacked into one prompt tends to produce a cluttered composition, so treat props as a short, deliberate list rather than everything you can think of.
6. Color, steam, and texture cues
Close with the sensory details that make food read as food rather than as a still-life object: a glisten of oil, visible steam, condensation on a cold glass, the specific browning gradient of a crust, the palette of the dish against its surroundings. "Visible steam rising from the broth, glossy sheen on the noodles, warm amber and green palette" does more work in a food prompt than almost any other single phrase, because these cues are exactly what a viewer's eye checks first to judge whether food looks fresh.
Common Food Photography Shot Types to Recognize First
Before writing anything, decide which of these you're actually recreating. Naming the shot type up front sets the composition before a single descriptive word is added.
- Overhead flat lay — top-down view, common for grain bowls, pizzas, spreads, and dishes with strong graphic layout; often includes several supporting props arranged around the main dish.
- 45-degree hero shot — the most common all-purpose angle, showing the dish's height and surface detail together; the default choice for menus and blog headers.
- Close-up or macro detail shot — a tight crop on texture, a cross-section, or a fork mid-bite, used to communicate quality and craft.
- In-action or pour shot — sauce being poured, cheese being pulled, steam actively rising; conveys freshness and movement.
- Lifestyle table setting — the dish shown within a fuller table scene, other plates or hands in frame, used for social content and restaurant ambiance marketing.
Mixing shot types in one prompt — describing an overhead layout while also asking for the height and steam detail of a 45-degree hero shot — produces a confused composition. Pick one per prompt, the same way a photographer picks one setup per frame.
Step-by-Step: Turning a Food Photo Into a Working Prompt
With the six elements in mind, here's the order that produces the most reliable results, whether you're writing the prompt by hand or checking one a tool generated for you.
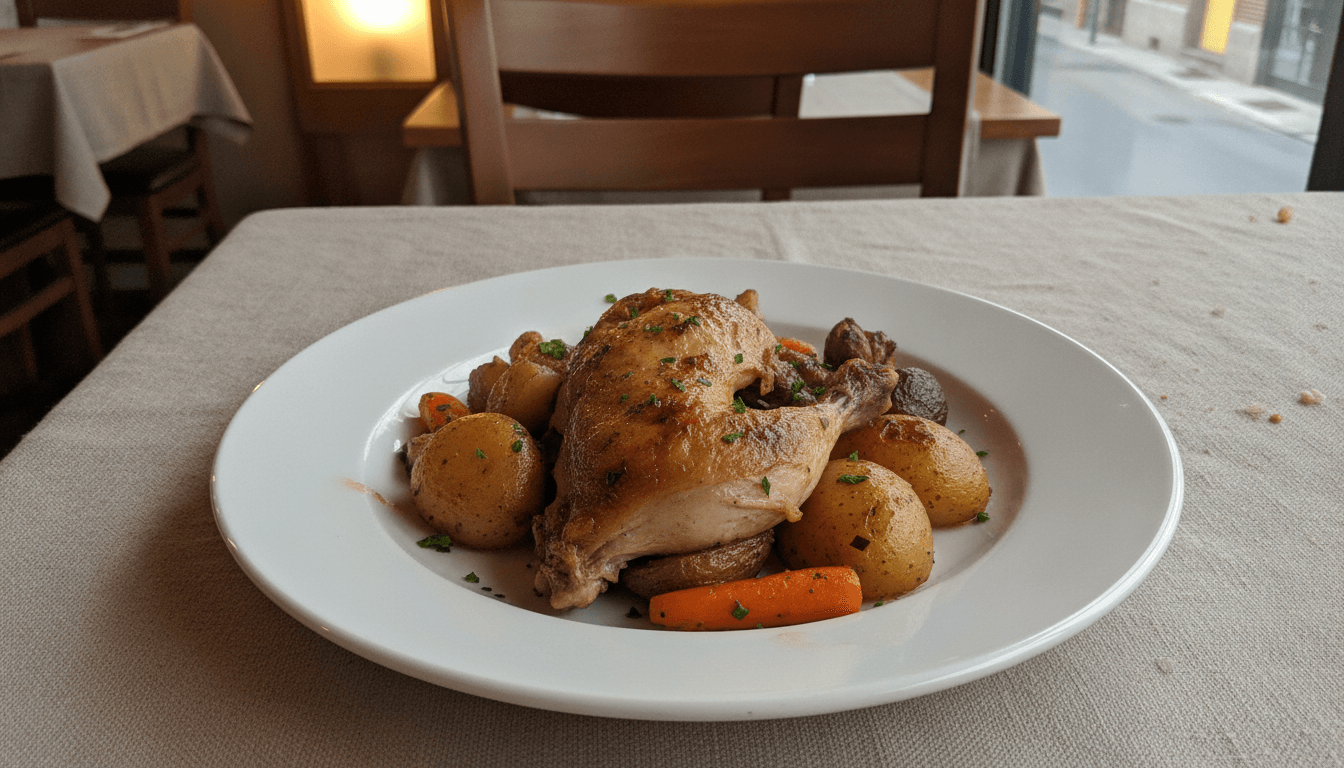
- Identify the dish and its visible ingredients — specific enough that someone who's never seen the photo could name the dish from your description alone.
- State the shot type: overhead flat lay, 45-degree hero, macro detail, in-action, or lifestyle table setting.
- Describe the plating style and composition — fine-dining, rustic, stacked, swiped, family-style.
- Name the camera angle and lens together (45-degree angle, 50mm lens, shallow depth of field).
- Name the lighting setup, not a mood (soft natural window light from camera-left; single warm side light, low-key).
- Describe the surface and no more than two or three supporting props.
- Add sensory and texture cues last, before quality tags — steam, glisten, condensation, browning gradient, palette.
- Close with quality and format tags relevant to your target generator (editorial food photography, high resolution, shallow depth of field).
Quality tags go at the end for the same reason they do in every other genre of prompting: they're the least specific words in the prompt, and putting them first pushes your actual description of the dish further from where a generator weighs it most heavily.
Reverse-Engineering a Prompt From an Existing Photo With ChatGPT or Gemini
If you already have a food photo — your own shoot, a supplier's image, or a reference you want to riff on — the fastest way to convert it into a prompt is to upload it to a vision-capable chat model and ask for a structured breakdown, rather than a general description.
Prompt to paste into ChatGPT or Gemini
Analyze the attached food photo and describe it in six parts, in this order:
1. The dish and its visible ingredients or garnish
2. The plating style and composition (fine-dining, rustic, stacked, family-style)
3. The camera angle and implied lens (e.g. 45-degree angle, shallow depth of field, top-down flat lay)
4. The lighting setup by name, not by mood (e.g. soft natural window light, single warm side light with deep shadows)
5. The surface and no more than three supporting props
6. Sensory and texture cues — steam, glisten, sauce viscosity, browning, condensation, color palette

Then give me the result twice: once as a natural, grammatical sentence, and once as a comma-separated list of descriptive tags.
Check the output against the photo before using it. Chat models occasionally invent a garnish or a prop that isn't actually there, or default to a generic mood word like "appetizing lighting" instead of naming the actual setup — both are easy to catch with a side-by-side look at the source image, and both are worth fixing before you send the prompt to a generator.
How Food Prompts Differ From Product Prompts
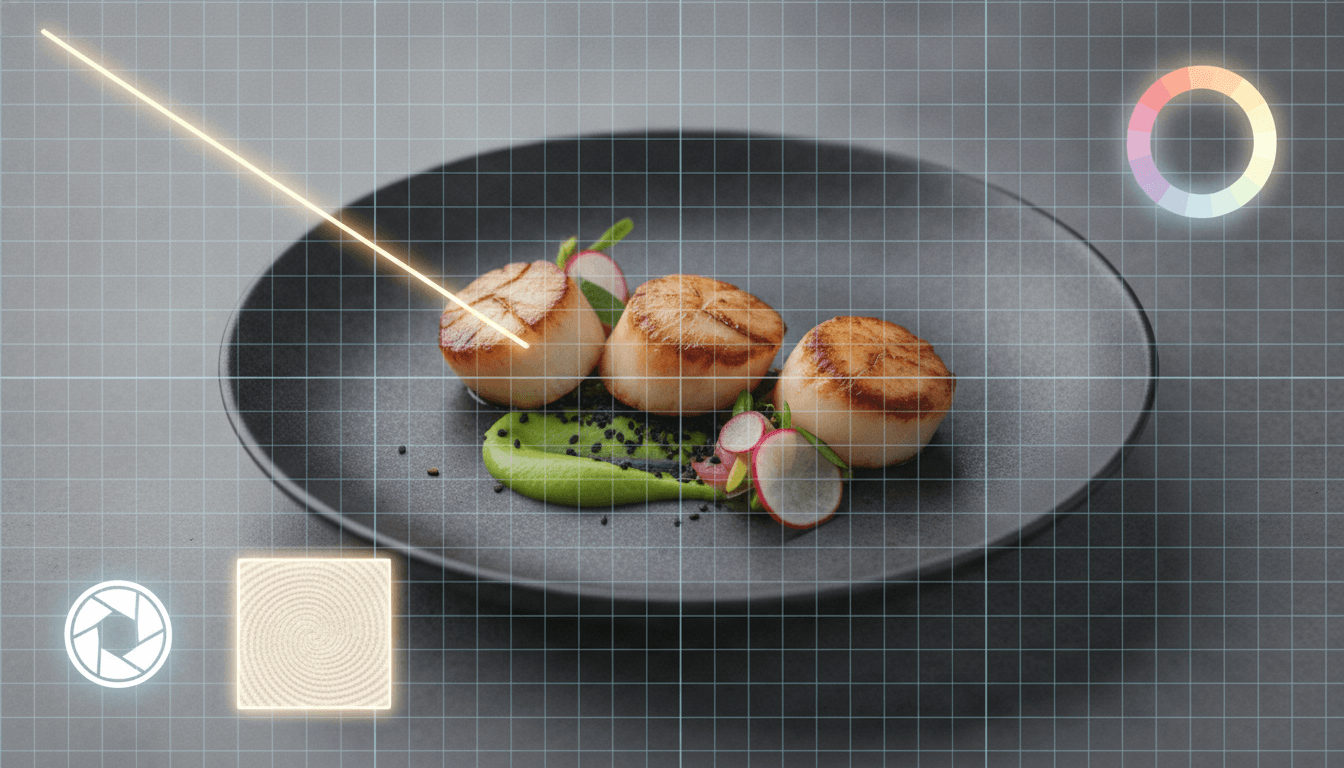
If you've already worked through the same process for e-commerce or catalog images, the underlying five-layer product framework in how to convert a product photo into an AI prompt for e-commerce photography will look familiar — subject, lighting, background, angle, and material all show up here too. The difference is that food adds a sixth, non-negotiable layer: sensory and texture cues. A bottle doesn't need a note about steam or glisten; a bowl of soup does. Skip that layer on a food prompt and the result tends to look sterile — technically correct plating and lighting, but missing the small cues that make food look like it was just plated rather than rendered.
Formatting Food Prompts for Each Generator
Once you have a clean six-part description, adapt the formatting to whichever generator you're using rather than rewriting it from scratch.
Midjourney
Front-load the dish and shot type, then list the remaining descriptors as dense, comma-separated fragments. Use --ar 1:1 for a social post or menu thumbnail, --ar 16:9 for a blog header, and keep --stylize closer to the default or slightly below it — food photography rewards accuracy over painterly interpretation, and high stylize values tend to push texture and color toward something more illustrative than photographic.
Flux
Flux responds well to natural, well-formed sentences and is particularly strong at rendering fine texture — the crumb structure of bread, the sheen on a glaze, individual grains of rice — when you describe them specifically rather than generically. Write the six-part description as flowing prose, and don't be shy about texture words; Flux tends to reward that specificity with more literal, less generic output.
Stable Diffusion
SDXL and similar checkpoints handle the same dense, tag-style prompts Midjourney does, but lean more heavily on negative prompts to clean up results. For food specifically, a negative prompt excluding "plastic-looking, waxy texture, distorted cutlery, blurry, extra dishes, cluttered background" measurably improves consistency, especially on general-purpose checkpoints not fine-tuned on food photography.
DALL·E (via ChatGPT)
DALL·E performs best with a natural, grammatical sentence rather than a tag list — the same six-part description rewritten as prose, in the order laid out above. Since DALL·E is accessed through ChatGPT, it's also the most convenient generator to test a reverse-engineered prompt against immediately, in the same conversation where you analyzed the source photo.
Gemini
Gemini's image generation also rewards natural sentence structure over keyword stacking, and it's a convenient place to do both halves of the workflow — analyzing an uploaded food photo and generating a new one — in a single conversation. If you're iterating quickly on a single dish (testing three lighting variations, for instance), keeping the analysis and generation in the same Gemini thread saves a lot of copy-pasting between tools.
ChatGPT as an end-to-end workflow
Worth calling out separately from DALL·E: ChatGPT is useful as the full pipeline, not just the generation step. You can upload the source photo, ask for the structured six-part breakdown in the same conversation, request the DALL·E-ready sentence version, generate the image, and ask for a revision — all without leaving one chat. That end-to-end convenience is the main reason ChatGPT is often the fastest single tool for one-off food images, even though a dedicated image-to-prompt tool will still outperform it on consistency across a larger batch.
Before vs After: Three Real Examples
Here's what the difference looks like across three common food shot types — the same underlying photo, described two ways.
Example 1 — Overhead flat lay (grain bowl)
Weak prompt:
healthy grain bowl, top view, food photography, delicious

Converted prompt:
overhead flat lay of a quinoa grain bowl with roasted sweet potato, sliced avocado, chickpeas, and a lemon-tahini drizzle arranged in distinct sections, top-down angle, 35mm lens, soft natural window light from directly overhead, matte stone-grey surface, linen napkin and a small dish of extra tahini in frame, warm amber and green palette, glossy sheen on the drizzle, editorial food photography
Example 2 — 45-degree hero shot (burger)
Weak prompt:
cheeseburger, juicy, restaurant quality, professional photo

Converted prompt:
stacked smash burger with melted cheddar draping over the patty edges, lettuce and tomato visible at the sides, sesame bun with a golden-brown sheen, 45-degree hero angle, 50mm lens, shallow depth of field, single warm side light with deep contrast shadow, dark charred-wood surface, a few loose sesame seeds scattered nearby, rich amber and red palette, visible steam rising from the patty, editorial restaurant photography
Example 3 — Macro detail (chocolate dessert)
Weak prompt:
chocolate dessert, close up, indulgent, high quality

Converted prompt:
close-up macro shot of a dark chocolate lava cake with a cracked top and molten center flowing onto the plate, straight-on angle, 100mm macro lens, extremely shallow depth of field, single warm key light from camera-left, matte black plate, a light dusting of cocoa powder and a single raspberry as the only prop, deep brown and crimson palette, glossy sheen on the molten chocolate, luxury dessert photography
In each case, the converted prompt isn't longer for its own sake — every phrase names something checkable in the source photo. That's the same test that applies to any product or food prompt: could someone who's never seen the original photo picture the shot correctly, dish and all, from the words alone?
Common Mistakes When Prompting Food Photography
- Leaning on taste words instead of visual ones — "delicious" and "mouth-watering" describe a flavor a model can't render, not anything it can see.
- Naming a lighting mood instead of a lighting setup, which leaves the model guessing at a direction and intensity it can't reliably reproduce.
- Overloading the prop list — five or six supporting items in one prompt usually produces a cluttered composition instead of a styled one.
- Skipping texture and sensory cues entirely, which is the single fastest way to end up with food that looks plastic or waxy rather than fresh.
- Describing color without tying it to a material or texture — "golden" means something different on a crust than on a sauce.
- Mixing shot types in one prompt, like combining an overhead layout with the height and depth cues of a 45-degree angle.
- Leading with quality tags instead of the dish description, which buries the one detail that actually needs to be accurate.
Best Practices for Consistent Menu or Catalog Shoots
A single hero image is a one-off task. A full menu, a week of social content, or a blog's back catalog is a consistency problem, and it rewards some upfront discipline.
- Fix your lighting and angle vocabulary once, before converting the first dish, and reuse the exact same phrases across the whole set.
- Decide on a house surface and prop style — one or two go-to backgrounds and a short, consistent prop list — so every dish reads as part of the same shoot.
- Convert the batch in one sitting rather than spreading it across days; wording drifts even when you're trying to stay consistent.
- Generate a test image from the first converted prompt before running the rest of the batch, so formatting issues get caught early.
- Keep dish-specific detail (ingredients, garnish, plating) unique per prompt, but keep lighting, angle, and surface language identical across the set — that's what makes a batch look like one shoot instead of many unrelated images.
How Prompt Snap Simplifies Food Photography Prompting
Working through six layers by hand for every dish in a menu doesn't scale much past a handful of photos. Prompt Snap automates the process this guide walks through: upload a food photo and it identifies the dish and visible ingredients, reads the plating and composition, names the lighting setup, separates the surface from any props, picks out the camera angle, and pulls the sensory cues — steam, glisten, color — then writes the result in that same order, so the output reads like a stylist's note rather than a keyword dump.
Pro and Business plans take it a step further and format that same analysis specifically for Midjourney, Flux, Stable Diffusion, DALL·E, or Gemini, so a single dish doesn't require rewriting the same description three or four different ways depending on where the image is headed. For a restaurant working through a full menu relaunch, that consistency matters more than it does on any single photo — it's the difference between a menu that reads as one cohesive shoot and one that looks like it was assembled from five different photographers.
Related Reading
Prompting other kinds of product images
The six-layer approach here builds on the same underlying logic used for e-commerce and general product images. If you're prompting anything beyond food — packaging, apparel, home goods — these two guides cover the broader framework and workflow.
Convert a product photo into an AI promptThe full multi-tool workflow
For the broader process of reverse-engineering prompts with ChatGPT and Gemini, then formatting for Midjourney, Flux, Stable Diffusion, and DALL-E across any product category, read the complete workflow guide.
How to Convert Product Images into AI PromptsHow do I convert a food photo into an AI prompt?
Break it into six layers and describe them in order: the dish and its visible ingredients, the plating and composition, the camera angle and lens, the lighting setup by name, the surface and a short prop list, and finally sensory cues like steam, glisten, and color. Close with quality tags last.
Why do AI-generated food photos often look fake or plastic?
Usually because the prompt skipped sensory and texture cues — steam, glisten, sauce viscosity, browning gradient. Those details are exactly what a viewer's eye checks first to judge whether food looks fresh, and without them a generator defaults to a flatter, waxier version of the dish.
What's the best camera angle to specify for food photography prompts?
It depends on the dish: overhead flat lay for graphic, layout-driven dishes like grain bowls and pizzas; a 45-degree angle as the reliable all-purpose choice that shows both top and height; and a straight-on macro angle for texture-forward, close-up shots.
Do I need different prompts for Midjourney, Flux, Stable Diffusion, DALL·E, and Gemini?
The underlying six-part description should stay the same; only the formatting changes. Midjourney and Stable Diffusion favor dense, comma-separated descriptor lists, while Flux, DALL·E, and Gemini generally perform better with a natural, grammatical sentence describing the same shot.
How do I keep a full menu shoot visually consistent using AI?
Fix your lighting, angle, and surface vocabulary before converting the first dish, then reuse those exact phrases across every prompt in the batch. Keep only the dish-specific details — ingredients, garnish, plating — unique per prompt, and convert the whole set in one sitting to avoid wording drift.
Can ChatGPT or Gemini accurately describe a food photo?
Both can, especially if you ask for a structured six-part breakdown rather than a general description. Double-check the result against the source photo first — chat models occasionally invent a garnish or prop that isn't actually in frame, or default to a vague mood word instead of naming the actual lighting setup.
What's the biggest difference between food and product photography prompts?
Food adds a sixth layer that product photography doesn't need: sensory and texture cues like steam, glisten, and browning. Skipping that layer is the fastest way to end up with a technically correct but visually sterile result.
Should I include taste words like "delicious" or "mouth-watering" in a food prompt?
No — those describe flavor, which a model can't render. Replace them with the visual cues that create the impression of deliciousness: glisten, steam, a specific browning gradient, a sauce's visible viscosity.
Can Prompt Snap generate food photography prompts automatically?
Yes. Upload a food photo and Prompt Snap analyzes the dish, plating, lighting, angle, surface, and sensory cues, then writes a structured prompt in that order — and on Pro and Business plans, formats it specifically for Midjourney, Flux, Stable Diffusion, DALL·E, or Gemini.
Conclusion
Food photography prompts reward the same kind of precision product prompts do, with one addition: the sensory layer. Because viewers have eaten thousands of real meals, they notice instantly when steam, glisten, or texture is missing — so those details aren't optional decoration, they're what separates an appetizing AI image from a waxy one. Work through the dish, the plating, the lighting, the angle, the surface, and the sensory cues in order, and the underlying description will carry cleanly into whichever generator you're using.
Do this by hand for a single hero shot and it takes a few focused minutes. Do it across a full menu or a month of content, and it's worth handing the repetitive analysis to a tool built for exactly that — so every dish gets the same careful, six-layer read, in the same order, every time.
Turn any food photo into a ready-to-use prompt
Upload a food photo to Prompt Snap and get a structured prompt — dish, plating, lighting, angle, and sensory detail included — formatted for Midjourney, Flux, Stable Diffusion, DALL·E, or Gemini in seconds.
Try Prompt Snap